Message History
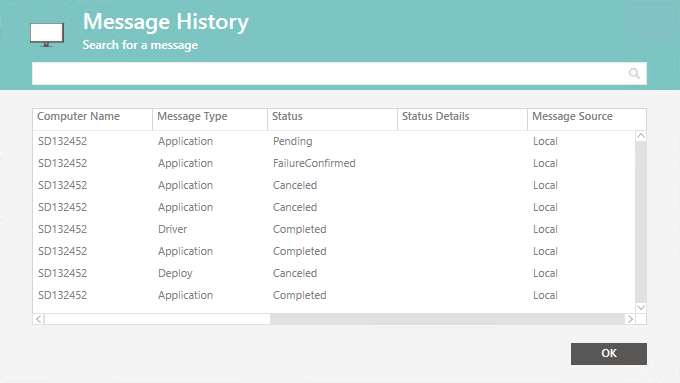
The Message History window can display all previous Computer Management activity for one or more selected clients in the SmartDeploy V3 console. It makes it easy to see the current status of a particular client, as well as what operations have been attempted, and whether those operations succeeded or failed. If an operation failed, you can see more information about why it failed. You can also cancel pending or scheduled operations.
Open Message History
To open Message History, browse to the Computer Management view. Right-click a single client, or use Shift or Ctrl+click to select multiple clients (note that Ctrl-A can be used to select all available clients), then right-click the selected clients.
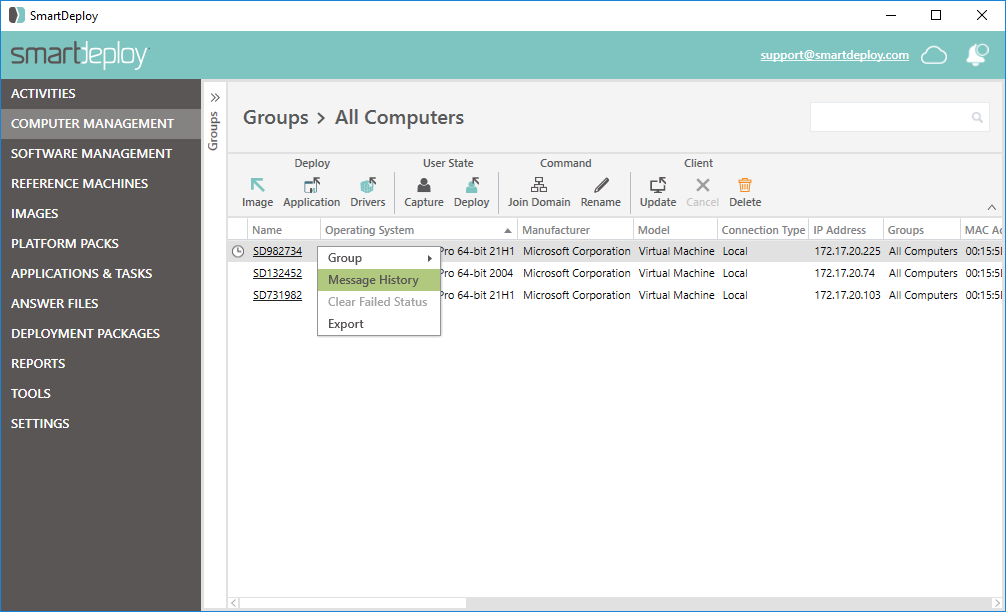
From the right-click menu, click Message History. The Message History window will appear over Computer Management, displaying all messages that have been sent to your selected client(s).
Search Message History
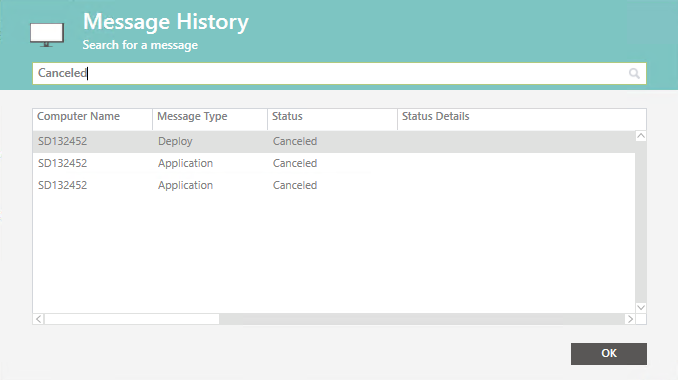
You can search for a specific message by typing in your query in the text box and pressing Enter.
Cancel a Pending Operation
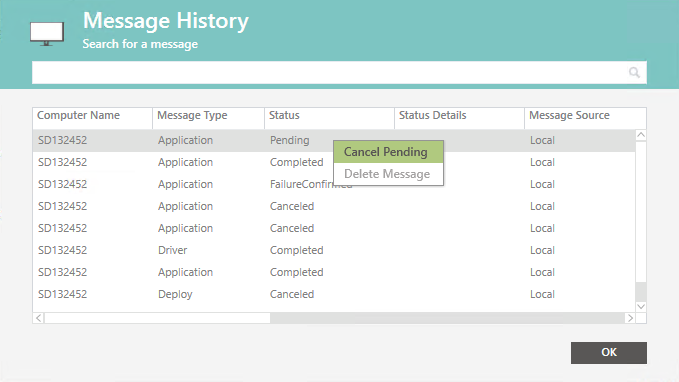
If an operation shows a status of Pending, this means that the operation is scheduled for a future date/time, and it has not yet occurred. If you wish to cancel the pending operation, you can right-click | Cancel Pending. Click Yes to confirm.
View, Troubleshoot, and Clear a Failure Message
When an operation has failed in Computer Management, the endpoint will show an error state in the Computer Management view. If you hold your mouse cursor over the Error flag in the leftmost column, it will display the error type.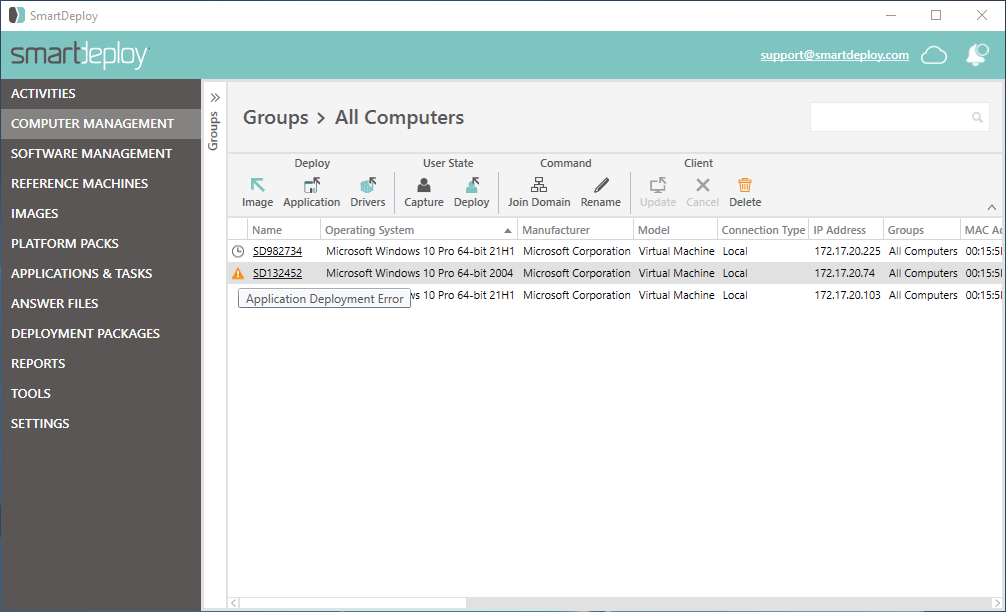
Right-click the computer that is in the error state and click Message History. Locate the error message and you can view the specific message in the Message History window. Look in the Status Details column for more information about the cause of the error - in this case, the service account username or password was incorrect.
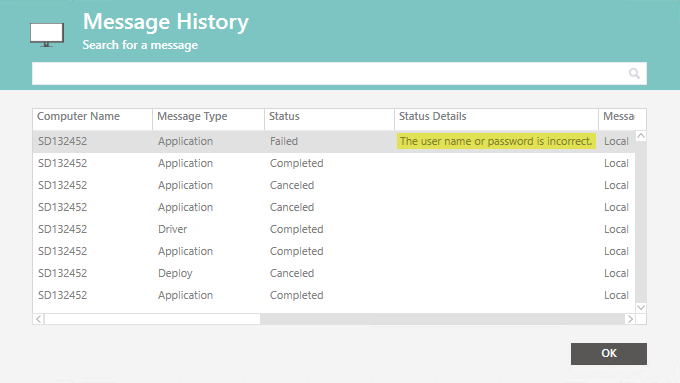
The Computer Management view will continue to display an error flag for this computer for as long as this message appears is the most recent. If you wish to adjust and retry the operation that failed, you may do so at any time - there is no need to "clear" the previous failure status before doing so.
However, if you wish to clear the failure message, you can do one of the following:
- In the Computer Management view, right-click the computer and click Clear Failed Status.
This will clear the failure flag in Computer Management, but it will not delete the failure message from Message History (it will appear with a new status of FailureConfirmed). - In Message History, right-click the specific message, and click Delete Message. Click Yes to confirm.
This will clear the failure flag and also delete the message from Message History.
Sort, Hide, and Rearrange Columns
Right-click any of the column headers to display a list of available columns. Check or uncheck them as desired to make them appear or disappear from Message History.
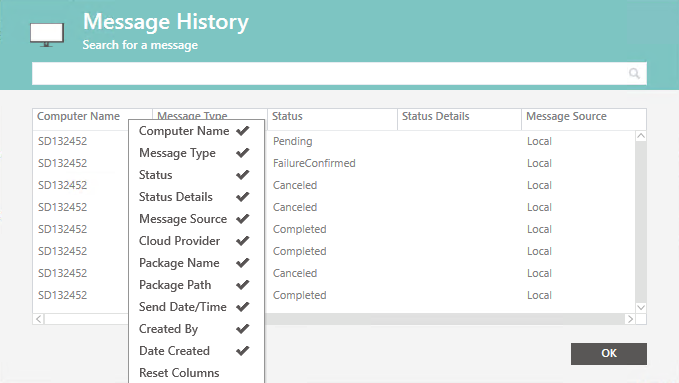
Note that there may be more columns visible than currently appear onscreen - use the horizontal scroll bar at the bottom of the Message History window to view them. To sort by a column, click the column header.
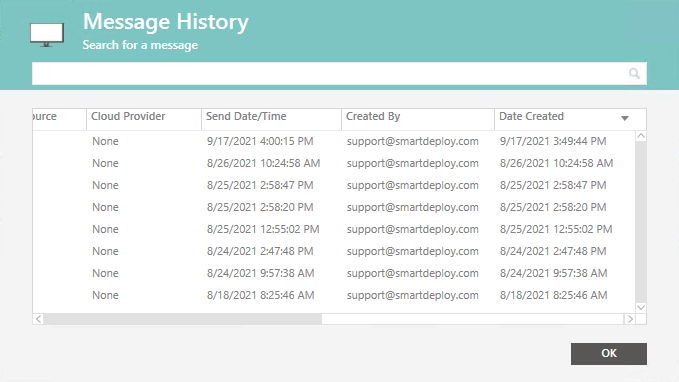
You can identify the current column sort by locating the up (ascending) or down (descending) arrow on the right of the sorting column header - and you can click the column header to toggle between ascending and descending. You can click and drag the horizontal lines between column headers to resize any of the columns.